DIY Christmas Advent Calendar
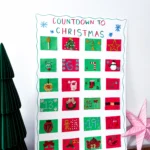
Count down to Christmas with this simple DIY advent calendar. Step-by-step directions, fill ideas, and tips for making it your own.
- Prep Time: 1 hour +
- Total Time: 1 hour +
- Category: Christmas, DIY
- Method: Step-by-Step
Materials
- Red Construction Paper
- Green Construction Paper
- Poster Board or Foam Board
- Markers
- Sequins, Pom Poms, Glitter Glue, or any other craft supplies to decorate
- Scissors
- Glue (Hot Glue works best)
- Christmas Activities Printable
Instructions
- Cut the red and green construction paper into rectangles. Measure the rectangles to ensure they will all fit on your poster board. You will need room for 24 rectangles. If wanted, leave room at the top to write “Christmas Countdown” on it.
- Fold the sides and bottom of the rectangles about .75 to 1 inch. You can glue the folded pieces down, but I find it is easier to get the slips of paper out without gluing it down.
- After folding, use your craft supplies to decorate each rectangle. I numbered mine 1-24, but they don’t need to be numbered. You can also skip the decorating and just write a number on each one.
- After decorating, glue the decorated rectangles to the poster board in order, if applicable. Use hot glue only on the folded sections of the construction paper. Do not put glue all over the back or you won’t be able to slide the papers in.
- Print the Christmas activities printable and cut out each activity.
- Fold and slide one slip into each construction paper pocket.
- Use markers to write “Christmas Countdown” on top. You can also add a squiggly border or draw snowflakes around the edges.